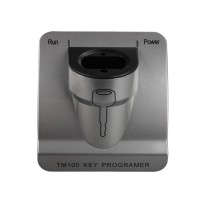
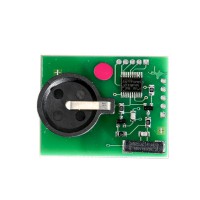
Tango Key Transponder Programmer with Basic Software V1.110.1 Update Online [Buy Now Send a Free TANGO OBD Cable]
Go And Check Now! Here>>>>
Note:
1. No need to wait until Black Friday, get the lowest prices now
2. Free shipping from the US/UK/EU, fast, and no tax.Enjoy!
For tech support Pls Contact Erin:
WhatsApp: +86 18054815707
Email: Sales@EOBD2shop.com
Product Description
2.New function for reading the Kilometers, VIN and transponder type for all BMW keys was added to the BMW software module! Immo pin code is also displayed for some car models.
Original Tango Key Transponder Programmer with Basic Software V1.110.1 Update Online
Promotion: Buy Now Send a Free TANGO OBD Cable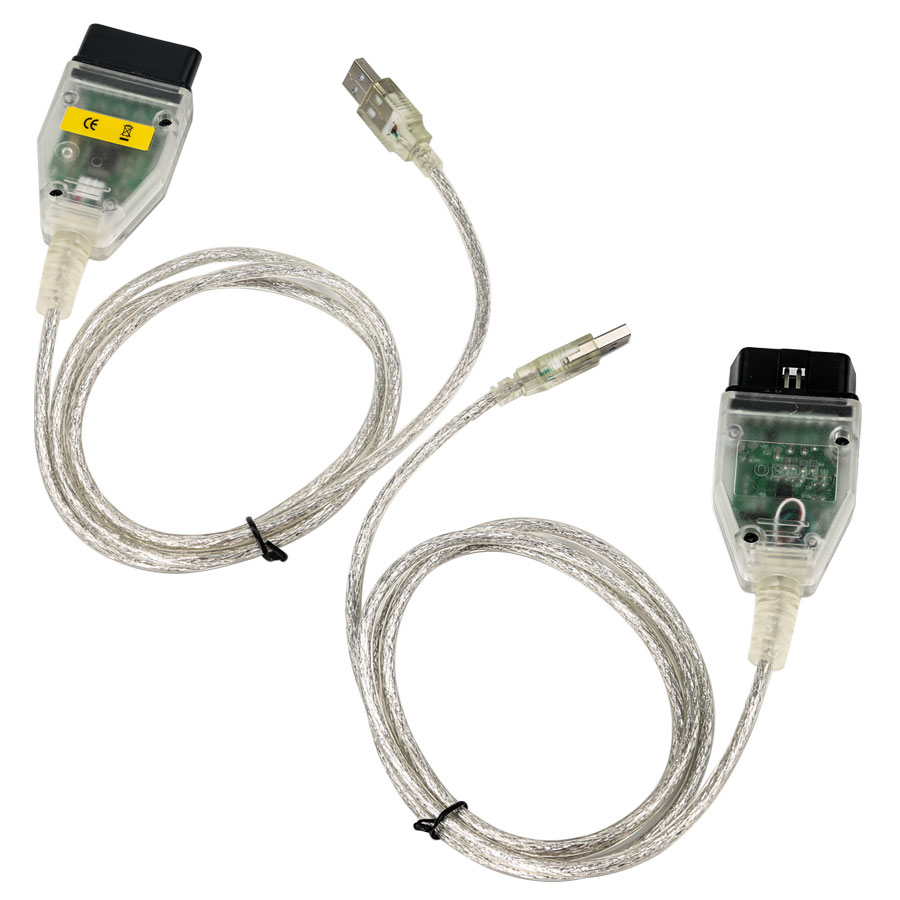
2.Update Free.The device needs to be updated within 28days,otherwise the device would be locked.You need to pay another cost if you want to activate special functions ,here is the offical website :www.scorpio-lk.com
Tango Software V1.100.6 Display:
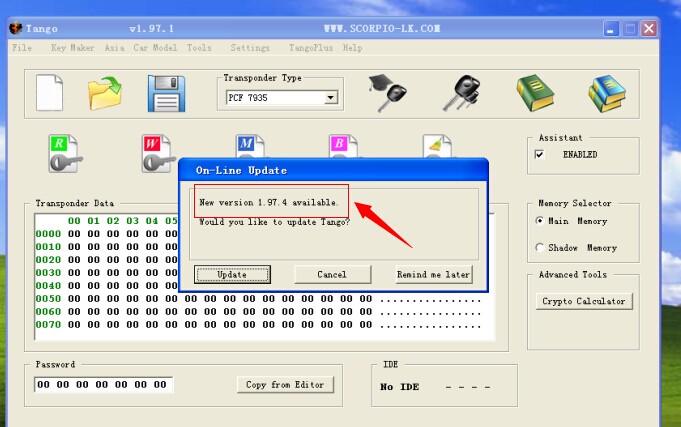
12.05.2018
Tango Maker Help File Update Updated Tango Maker Help file requires Tango software version 112.1
09.05.2018
Tango Software v1.112 Tango software added (online update)
Added new transponder MEGAMOS AES
Toyota key maker: new menu item AUTODETECT
Key maker Kia Sportage 2008- (MPC5xx,HITAG)
Key maker Hyundai Sonata 2008- (MPC5xx,HITAG)
Key maker Renault Fluence III 2012- (NEC850,HITAG)*
Key maker Renault Megane III 2012- (NEC850,HITAG)*
Fixed some bugs, incl. PCF7930-35
tango update 1.110.1 software
[+] SLK-05 Transponder launched! Supports Toyota’s SmartKey AES
(Page1 39)emulation. This feature allows to start an engine, to
Learn new keys.
[+] TangoPlus for Toyota V6.5
True Emulation via OBD of all SmartKeys Page1 39*
The only right conception to solve the “All Keys Lost”problem.
[+] Image generator Toyota Page1 39 on SLK-05.The generated
Transpinder is fully compatible to Toyota requirements that A
Customer is able to learn it vla OBD.*
[+] Cloning Toyota SmartKey 128BIT(Page1 39) to SLK-05*
[+] Key maker BCM2 Audi A4/A5/Q5(95320,PCF7945AC)*
[+] Key maker BCM2 Audi A4/A5/Q5(NEC,PCF7945AC)*
[+] Key maker Ford Transit 2017-(NEC,DST80)*
[.] Improved Toyota Certification ECU maker: compatibility for keys
Page1 39
[.] Improved operations with PCF7930,31,35. Now it is possible to make Individual settings to each type of transponders
List of supported transponders:
Philips transponders:
PCF7930-31 writing, reading
PCF7935 writing, reading, shadow memory, crypto calculator
PCF7936 writing, reading, modes password, crypto, Manchester & Biphase encodings
PCF7941 transponder, remote, eeprom, Manchester & Biphase encodings
PCF7942 transponder, remote, eeprom, Manchester & Biphase encodings
PCF7943 transponder, remote, Manchester & Biphase encodings
PCF7944 transponder, remote, eeprom, Manchester & Biphase encodings
PCF7945 transponder, remote, eeprom, Manchester & Biphase encodings
PCF7946 transponder, remote, Manchester & Biphase encodings
PCF7947 transponder, remote, eeprom, Manchester & Biphase encodings
PCF7952 transponder, remote, eeprom, Manchester & Biphase encodings
PCF7961 transponder, remote, Manchester & Biphase encodings
*Auto switching between PCF7936-PCF7961 windows if invalid type detected.
*Autodetect manchester / biphase
Temic transponders:
Temic 11 reading , writing to T5
Temic 12 reading , writing to T5
Megamos transponders:
Megamos (13) reading , writing to T5 , emulating on PCF7930-35
Megamos (48) reading, writing, PIN, unlock by PIN, full range of memory contents, crypto calculation
Megamos CRYPTO-2 (8E) read ID, read/write EEPROM, write Cryptokey
Texas transponders:
Tiris (4C) reading
Tiris (4D) DST crypto reading, writing, crypto calculator
Tiris (4E) DST crypto reading, writing, crypto calculator
Tiris (8C) reading
Atmel:
TK5551M (T5 replacement)
SAAB reading , writing to T5
The product is in working out stages, therefore the list of the supported transponders will be developed later.
Key maker usage.
Key maker usage consists of a four steps. The 4-th step is additional and depends on a vehicle model.
1. Open an immobilizer dump file.
2. Choose number of the key you want create.
3. Place a transponder into the coil and click the WRITE button.
4. In some cases the program asks you to save a modified immobilizer dump. This dump must to be written into the immobilizer.
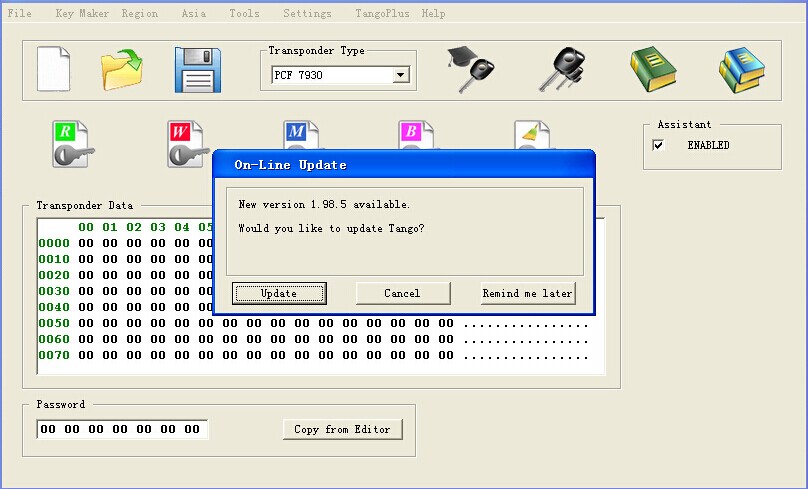
First of all, take a look at this picture. The "Loaded File" window displays the immobilizer file name. Ensure that a valid dump is stored. The "Maker" window displays selected maker name. Ensure the right key maker selected.
The "info" windows display an important information:
1. Original transponder---Informs you about type of the original transponder
2. Allowed transponder---Informs you what type of transponders is suitable for the key maker
3. Data location---The immobilizer memory may be stored in various chips, the description informs you about from where you have to read a dump. Some immobilizers can have various chipsets. In this case the field displays several possible chips. Find one of them inside of the immobilizer and read it.
4. Data size---Each chip has certain memory size, the key maker accepts files with the described size.
5. Data format---This field appears in case of 93CXX eeprom seria.
There are two standards of data layout:
Intel format and Motorola format or Little Endian and Big Endian respectively.
The data layout depends on a chip-programmer that is used for eeprom reading.This field informs you what kind of format is suitable for the key maker.Usually you can see that both formats are suitable. It means that the program can understand any data layout.
Create a key step by step:
Firstly, run the key maker interface according to the vehicle and read information in the "Info" window. Watch theData location field describes the memory chip. Find out the chip inside of the immobilizer and read it. Save the read data (dump).
Click the "OPEN IMMOBILIZER FILE" button and load the saved dump.
The program will analyse the dump.
If the dump is correct the "WRITE" button will become active and the "Keys" window will display the range of key numbers that can be created.
Take a look at the "Info" window, the Allowed transponder field.
Ensure you use a transponder exactly the indicated type.
Place the transponder into the coil.
Choose the key position you want create in the "Keys" window.
Click the "WRITE" button.
This starts the writing process and transponder will be stored with the appropriate data.
At this point you may be asked to save a new immobilizer dump.
The program displays a standard File Save dialog where you have to save the data.
After this you will be informed about the new data saved and must be written into the immobiliser.

Write the new dump into the immobilizer. Now it is ready to operate with the created transponder.
If you are not asked to save a new file, it means that immobilizer is ready to operate with the created transponder without file replacing.
Finish.
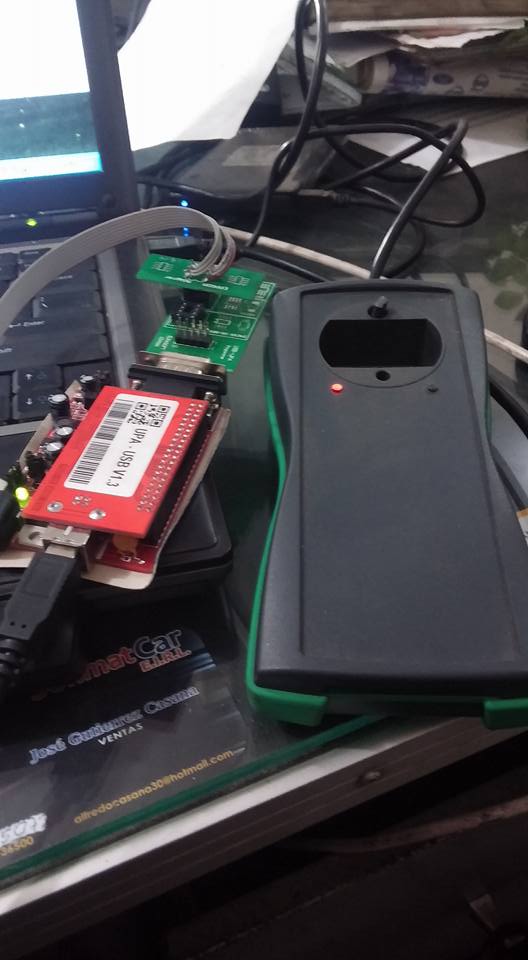
Customer Pictures Using Tango and UPA to Program Toyota Fortuner 2010 Imobox 93 Cuy Key:
Which tool to program key for 1999 Toyota Avalon
Purpose: to read eeprom from a 1999 Avalon & write it to a key(4c chip)
Car: Toyota Avalon the year 1999
Immobilizer: Type 1
Done: have read eeprom with Lonsdor
Will do: write it to a key(4c chip), how to
Options to write a key to 1999 Avalon:
Option 1:
If you have a good eeprom writer like Tango, it’s better to write.
Option 2:
If you have zed bull mini and effi software, you can work with dump.
Option 3:
You read the file with Lonsdor K518ise
Then you need use one tool to write like Tango or VVDI2
I mean, You have read the file with Lonsdor.
Connect Lonsdor with pc, copy file to pc, open with Tango
Btw, you have to insert the key into the key reader slot below.
Good to know:
Transponder chip key to 1999 Toyota Avalon:
Since this 1999 Toyota Avalon key blank has uncut blade and it is not set up with your vehicle, so it will require cutting and registration (programming) for your 1999 Toyota Avalon by your local dealer in your area or local car locksmith. Proof or ownership for your vehicle will most likely be required (like title, registration, insurance card) to make sure you are the owner or authorized user. Like most late model vehicles, this 1999 Toyota Avalon key has a transponder chip, part of your automobile security system, in the head of the key. This transponder key has a circuit, chip hidden inside the head of the key. Most of us are not aware of the fact because the chip is not visible and molded inside of the black plastic head. Important: this key will require both cutting and programming to you 1999 Toyota Avalon for it to work. It can easily be programmed by a local car locksmith or dealer service department.
TEX 4C chip inside:
This key replaces or works with the following keys: OE Toyota 89785-26020, Strattec 692062, Ilco TOY43AT4, Bianchi BTOY43AT4, Hata TR47HPT, HAT2602, Jet TR47PHT, JMA TP07VTOYO15P
Also compatible with: 98-02 Toyota 4Runner, 98-04 Toyota Avalon, 98-06 Toyota Camry, 01-03 Toyota Highlander, 98-02 Toyota Land Cruiser, 01-03 Toyota Prius, 01-02 Toyota Sequoia, 99-03 Toyota Sienna, 98-03 Toyota Solara 1998-2003
How to program a remote to 1999 Toyota Avalon:
- 1
Enter and sit in the driver’s seat, keeping the driver’s door open and unlocked. Insert the key in the ignition then remove without turning.
- 2
Lock and unlock the doors using the master switch on the driver’s door. Repeat this until you’ve completed five lock/unlock cycles. This step must be completed in 10 seconds.
- 3
Close, then open the driver’s door and repeat Step 2.
- 4
Insert the key into the ignition and turn to the “On” position. Do this two times without starting the car, then remove the key from the ignition. Within three seconds, the power door locks should cycle automatically, indicating successful entry into programming mode. Return to Step 1 if the locks do not cycle at this point.
- 5
Press the lock and unlock buttons on the remote simultaneously for 1 second.
- 6
Press the lock button by itself and hold for 2 seconds immediately after completing Step 5. The door locks should cycle once, indicating successful programming. If the door locks don’t cycle, or cycle twice, repeat Steps 5 and 6.
Shipment Option and Delivery Time In EOBD2shop
1. Shipment from Shenzhen/ Hongkong warehouse
1)DHL Shipping and Other Express Service:
- Take About 5-7 working days
- DHL will be the default delivery method
- To help you clearance we will help declare a lower price on the invoice to help clearance.
- If address is remote area, you need pay remote freight 45 USD or we will ship by Normal Post or Yanwen/EMS/Aramex Express.
- For some eu countries, there might be customs duty problem, if you have any special rquest on this, you can email to inform us your suggestions.
- Take About 7-10 working days, No Tax Problem
- Usually No Tax for European Countries or Remote Area. The tax was pre-paid, when package reached, there's no tax no extra fee for customers.
- Due to high custom tax in European Countries, Like Canada, Germany, Greece, Romania, Sweden, France,etc, we will use Yanwen express as first option, if you will need faster DHL shipment, please contact us, thank you.
- Take About 10-16 working days, Sometimes will be 20 days.
- Registered Airmail Includes Netherlands Post, USPS Post, Singapore Post, Hongkong Post, etc
- Order amount less than 150USD, and package weight less than 2KG will be sent by Registered airmail.
- But if you feel it is really slow, and want us to send by DHL, you can choose "Premium Delivery" and pay for the extra shipping for express service. finally we will send it by DHL.
- Item title marked "Ship from US"
- Take About 3-5 working days, Free TAX, faster shipping with cheaper price.
- Note: If US/UK Stock sold out, your order will be shipped from China via DHL or YANWEN (No Tax) by default.
- We have stocked up hot sale items in US, UK, Amazon US, and EU Warehouse, which is more convenient for you.
- EU Warehouse was located in Germany/Czech and it only can ship to EU country:
Germany, France, Spain, Netherlands, Finland, Sweden, Austria, Belgium, Bulgaria, Croatia,
Czech Republic, Denmark, Estonia, Greece, Hungary, Ireland, Latvia, Lithuania,Luxembourg,
Malta, Poland, Portugal, Republic of Cyprus, Romania, Slovakia, Slovenia,5-7 DaysRoyal Mail/ DHL
We can offer you lifetime customer service and tech support. If you have any problems, please Provide error image or video to show the problem, and kindly describe it in detail, technician will try their best to help you solve the problem. If there are no solution, you can return it for refund or get a new one for replacement.
For any question, please contact us at:
- Whatsapp: +8618054815707
- Email: sales@EOBD2shop.com
- Hot line: +8618054815707
- Skype: careucar
- Accepting bulk purchases, We can Offer you wholesale price.
- EOBD2shop is a OBDII tool online supplier providing best-quality ECU chip uning tools, car diagnostic tools, OBDII Code scanners, car key programmers, heavy duty scanners, locksmith tools etc.
- Besides, we are the agent for many original brand such as Autel, Xhorse, OBDstar, VXdiag, XTOOL,Launch,CGDI, Yanhua ect.

Tech support
2.Connecting the device to PC and make sure the driver is well installed.
3.Open the software and select the Check updates under Help menu.
![Tango Key Transponder Programmer with Basic Software V1.110.1 Update Online [Buy Now Send a Free TANGO OBD Cable]](/upload/pro-md/13123101380429253.jpg)
![Tango Key Transponder Programmer with Basic Software V1.110.1 Update Online [Buy Now Send a Free TANGO OBD Cable]](/upload/pro-md/13123101380529254.jpg)
![Tango Key Transponder Programmer with Basic Software V1.110.1 Update Online [Buy Now Send a Free TANGO OBD Cable]](/upload/pro-md/13123101380529255.jpg)
![Tango Key Transponder Programmer with Basic Software V1.110.1 Update Online [Buy Now Send a Free TANGO OBD Cable]](/upload/pro-md/13123101380529256.jpg)
![Tango Key Transponder Programmer with Basic Software V1.110.1 Update Online [Buy Now Send a Free TANGO OBD Cable]](/upload/pro-md/13123101380529257.jpg)
![Tango Key Transponder Programmer with Basic Software V1.110.1 Update Online [Buy Now Send a Free TANGO OBD Cable]](/upload/pro-md/170717001347177328.jpg)


